Shortly after production began on Brandt Peters’ Stingy Jack sofubi, Shinji Nakako of Tomenosuke-syoten has been diligently chronicling the figure’s production process from start to finish. The idea of CP sofubi was first sparked last year and since then, we’ve all eagerly watched this jester-like Jack-o’-lantern come to life, one sketch, WIP shot and prototype at a time.
But now, for the first time, experience the process from a completely behind-the-scenes perspective; the digital models, the revisions, the wax models and pantones … a glimpse at just how much goes into creating the toys we covet.
This is the first instalment of Shinji’s ‘Making of Sofubi Stingy’ series, with many more to come. Enjoy!
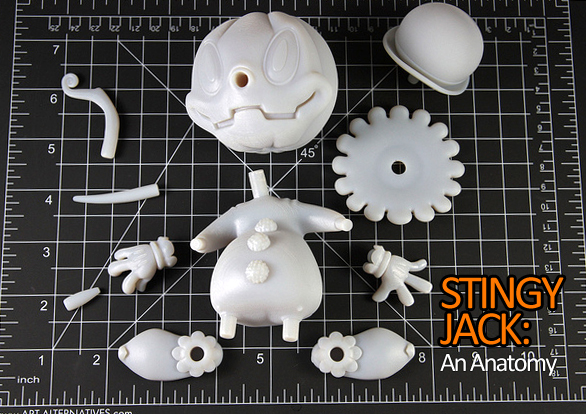
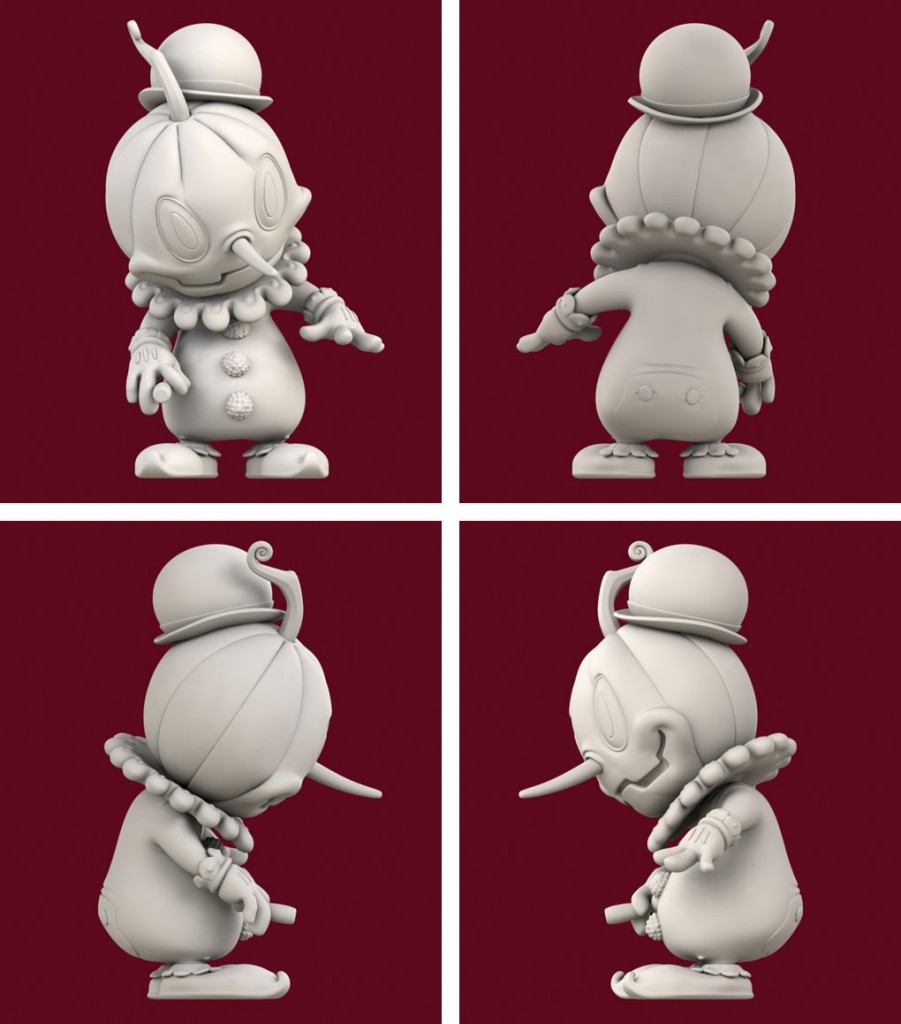
The above 3D rendering (by none other than CP’s own Teodoru Badiu) is what started it all; Brandt emailed this to Shinji for review and later shipped the original prototype (up top) to re-sculpt for the sofubi version based on the above image. With both ingredients side-by-side, the sculptors were able to determine what modifications would have to be made.
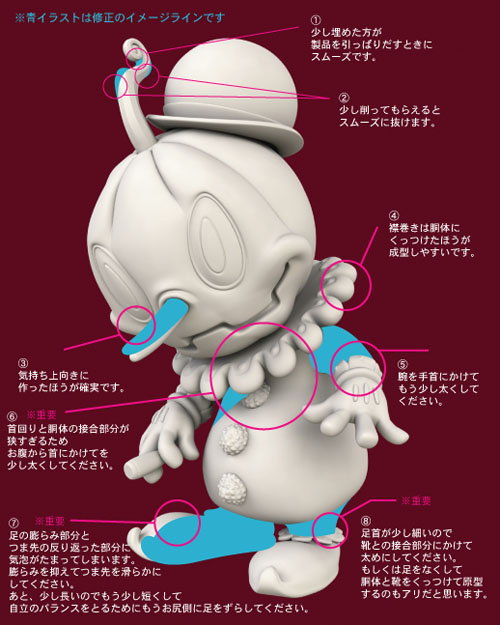
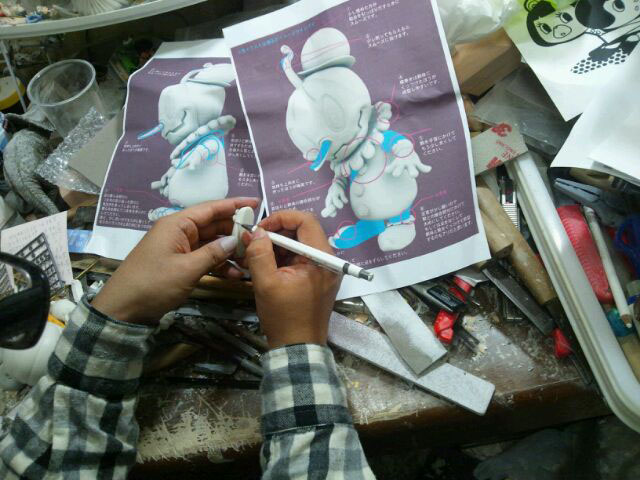
And voila: Stingy 2.0. This photo outlines all the alterations that’d have to be made to the original prototype to reflect the look of the 3D rendering. The numbered explanations below correspond to the numbers in the image. Shinji sent the memo to Brandt, who gave the OK to proceed.
1.Fill in a little, in order to pull out the sofubi figure from the mold smoothly.
2.Prune a little.
3.Cock a little.
4.Combine the collar and body.
5.Make the arm little thick toward the wrist.
6.IMPORTANT Interface between the neck and body are too narrow. Make it thick from the stomach to neck.
7.If keeping the shape as it is currently, air-bubbles will be stand between the bulge of the dorsum of shoes and recurvate toe. Hold down the bulge and scrape down the toe. Moreover, smaller the shoes and to balancing for stand, place the shoes more backward.
8.Ankle is too thin, so make it thicker. Or, how about taking off the leg and directly assemble the shoes to the body.
It’s now time to sculpt. Shinji called upon Shigeta of Goccodo Design Works, who in turn recommended Yohei from Mirock Toy to sculpt the figure. Both Shigeta and Yohei then made it their mission to preserve the magic and personality of the original image, even calling upon RealxHead’s Mori Katsura for technical advice during this process. Talk about sculptural supergroup!
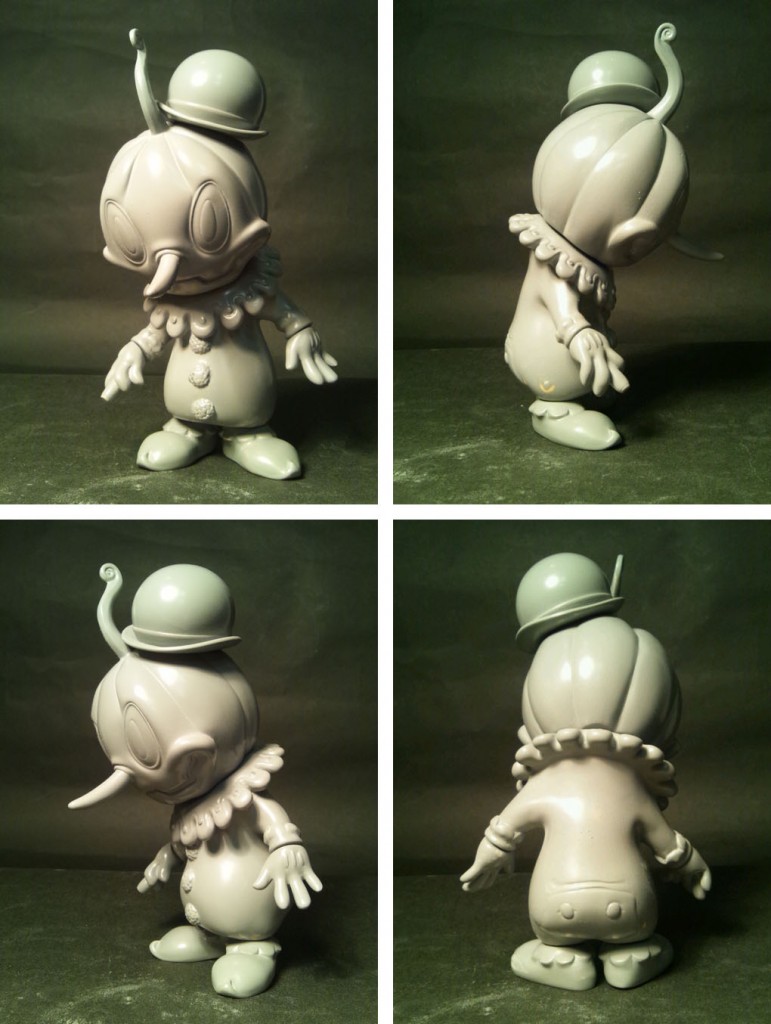
And there he is: Yohei’s modified Stingy Jack in the flesh … er, sofubi. Up next: we head to Obitsu, a renowned plastics factory where Stingy meets his wax double and takes a spin in the metal molds — literally!
Also be sure to follow the Tomenosuke blog for up-to-the-minute coverage on all Circus Posterus x Tomenosuke sofubi releases!
Pingback: » Stingy Jack: An Anatomy, Part II News | Circus Posterus